Honeywell FocusPRO TH6000 Series⁚ Installation Overview
The Honeywell FocusPRO TH6000 series is designed for easy installation and broad compatibility with various HVAC systems.
Compatibility with HVAC Systems
The Honeywell FocusPRO TH6000 series thermostats are engineered to be compatible with a wide array of heating, ventilation, and air conditioning (HVAC) systems. This compatibility extends to both traditional and modern setups, ensuring that the thermostat can be integrated into existing home infrastructures with minimal hassle. The series supports single-stage, multi-stage, heat pump, and radiant heating systems, offering flexibility for different household needs. It’s crucial to verify that your specific HVAC system is supported by consulting the thermostat’s documentation or the Honeywell website. Understanding your system type is essential for proper installation and optimal performance. Improper configuration can lead to inefficient operation or damage to your HVAC equipment. Therefore, before proceeding with the installation, identify the type of system you have to ensure a seamless integration process. This step will save you time and prevent potential issues down the line, guaranteeing that your Honeywell FocusPRO TH6000 thermostat functions correctly and efficiently with your home’s climate control system.

Preparing for Installation
Before installing the Honeywell FocusPRO TH6000, gather all necessary tools and materials. This ensures a smooth and efficient setup process.
Tools and Materials Needed
To successfully install your Honeywell FocusPRO TH6000 series thermostat, it’s essential to have the right tools and materials on hand. This preparation will streamline the installation process and ensure a secure and functional setup.
- Screwdrivers⁚ A Phillips head and a flathead screwdriver will be necessary for loosening and tightening screws on the thermostat and wallplate.
- Pencil⁚ Use a pencil to mark the locations for mounting screws and to label wires if needed.
- Wire Stripper⁚ A wire stripper is crucial for safely removing the insulation from the ends of the wires to ensure proper connections to the thermostat terminals.
- Level⁚ A small level will help you ensure that the wallplate is mounted straight for a professional-looking installation.
- Drill (optional)⁚ If you’re mounting the thermostat on a hard surface like plaster or brick, you might need a drill to create pilot holes for the screws.
- Wire Connectors (optional)⁚ Use wire connectors to extend wires if needed and to ensure secure connections.
- New Batteries⁚ Have new batteries on hand to power the thermostat after installation.
Wallplate Installation
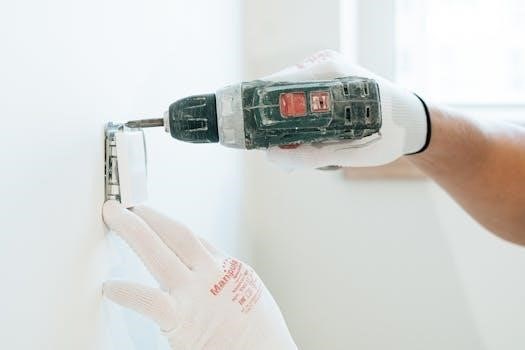
The wallplate installation is a crucial step in setting up your Honeywell FocusPRO TH6000 series thermostat. Proper wallplate installation ensures that the thermostat is securely mounted and correctly aligned for optimal performance. Begin by removing the existing thermostat from the wall, if applicable, and carefully disconnecting the wires, labeling them for easy reconnection later.
Next, separate the wallplate from the new thermostat by gently pulling it away. Position the wallplate on the wall at the desired location, ensuring it is level using a level tool. Use a pencil to mark the locations for the mounting screws through the holes on the wallplate. If you are installing on a drywall surface, you can proceed to screw the wallplate directly into the wall using the provided screws. For harder surfaces like plaster or brick, you may need to drill pilot holes before inserting the screws. Ensure the wallplate is securely attached to the wall before proceeding.
Once the wallplate is mounted, carefully pull the thermostat wires through the wire hole in the center of the wallplate, preparing them for connection to the thermostat terminals. This careful preparation will ensure a smooth and accurate wiring process.
Wiring Connections
Accurate wiring is critical for the Honeywell FocusPRO TH6000 to function correctly. Understanding your system’s wiring configuration is the first step.
Understanding Wiring Configurations
Before connecting any wires to your Honeywell FocusPRO TH6000 thermostat, it is essential to understand the different wiring configurations commonly used in HVAC systems. Incorrect wiring can lead to malfunction or damage to your equipment.
Common Wiring Systems⁚
- Conventional Systems⁚ These include standard heating and cooling systems with separate wires for heating (typically labeled “W”), cooling (“Y”), fan (“G”), and a common wire (“C”).
- Heat Pump Systems⁚ Heat pumps utilize different wiring configurations, often with separate wires for heating and cooling modes (usually labeled “O/B” for reversing valve control).
- Multi-Stage Systems⁚ Some systems have multiple stages of heating or cooling, requiring additional wires to control each stage.
Identifying Your System⁚
Carefully examine the existing wiring connections on your old thermostat. Note the color and terminal location of each wire. This information will be crucial when connecting the wires to your new Honeywell FocusPRO TH6000.
Using Wiring Diagrams⁚
Refer to the wiring diagrams provided in the Honeywell FocusPRO TH6000 installation manual. These diagrams illustrate various wiring configurations and the corresponding terminal connections on the thermostat. Match your system’s wiring to the appropriate diagram for accurate installation.
Connecting Wires to Terminals
Once you have identified your wiring configuration, you can proceed with connecting the wires to the appropriate terminals on the Honeywell FocusPRO TH6000 thermostat. Follow these steps for a secure and accurate connection⁚
- Prepare the Wires⁚ Ensure that the ends of the wires are clean and stripped to the correct length (approximately 1/4 inch) to expose the bare copper conductor.
- Identify Terminals⁚ Refer to the wiring diagram in the installation manual to identify the correct terminal for each wire. The terminals are typically labeled with letters corresponding to the function of the wire (e.g., “W” for heating, “Y” for cooling, “G” for fan, “C” for common).
- Loosen Terminal Screws⁚ Use a small screwdriver to loosen the terminal screws on the Honeywell FocusPRO TH6000. Do not remove the screws completely.
- Insert Wires⁚ Insert the bare end of each wire into the corresponding terminal opening. Ensure that the wire is fully inserted and makes good contact with the terminal.
- Tighten Terminal Screws⁚ Tighten the terminal screws securely to clamp the wires in place. Be careful not to overtighten the screws, as this could damage the terminals.
- Verify Connections⁚ Gently tug on each wire to ensure that it is securely connected to the terminal.
Important Considerations⁚
- Common Wire (“C”)⁚ A common wire is often required for the thermostat to function properly, especially for Wi-Fi-enabled models. If you do not have a common wire, you may need to install one or use a compatible adapter.
- Heat Pump Systems⁚ When wiring heat pump systems, pay close attention to the “O/B” terminal, which controls the reversing valve. Ensure that you select the correct setting for your system (O or B) during the thermostat setup process.
Thermostat Mounting
After completing the wiring, the next step is to mount the Honeywell FocusPRO TH6000 thermostat onto the installed wallplate. This process is straightforward.
Attaching the Thermostat to the Wallplate
Once the wallplate is securely mounted and all wiring connections are properly made, you’re ready to attach the thermostat to the wallplate. This is generally a simple process involving aligning the thermostat with the wallplate and gently pressing it into place until it snaps or clicks securely. Ensure that all pins on the back of the thermostat align correctly with the corresponding terminals on the wallplate. A firm, even pressure is usually sufficient to establish a solid connection. Avoid excessive force, which could damage the thermostat or the wallplate. After attaching the thermostat, gently tug on it to confirm that it is securely fastened and doesn’t wobble. If the thermostat has a battery compartment, ensure that batteries are installed correctly before attaching it to the wallplate. Some models may require a specific orientation or polarity for the batteries. Refer to the thermostat’s manual for detailed instructions and diagrams specific to your model. After the thermostat is securely attached, you can proceed with the system setup and configuration to customize its settings to your specific HVAC system and preferences. This may involve setting the system type (heating/cooling), programming temperature schedules, and configuring any advanced features offered by the thermostat. Always consult the user manual for comprehensive guidance on system setup and configuration. This part is crucial for efficient usage.

System Setup and Configuration
After the physical installation, configure system settings. This involves setting the system type and running an installer system test.
Setting System Type (Heating/Cooling)
Configuring the system type on your Honeywell FocusPRO TH6000 is crucial for ensuring optimal performance and compatibility with your specific HVAC setup. This step involves specifying whether your system is a traditional heating and cooling system, a heat pump, or another type of configuration. Access the installer setup menu to define the system type. Selecting the correct system type allows the thermostat to control the heating and cooling equipment appropriately. Incorrect settings can result in inefficient operation, discomfort, or even damage to the HVAC system. Refer to the installation manual for detailed instructions on navigating the setup menu and choosing the appropriate system type for your home. You may need to specify the number of heating and cooling stages your system has. This information is typically found on the equipment itself or in its documentation. Proper system type configuration ensures that the thermostat accurately manages your home’s temperature and maximizes energy savings. Carefully review the options and select the one that matches your HVAC system.
Installer System Test
After completing the wiring and system setup, performing the Installer System Test is essential to verify that the Honeywell FocusPRO TH6000 is correctly controlling your heating and cooling equipment. This test allows you to manually activate different components of your HVAC system, such as the heating, cooling, and fan, to ensure they are functioning as expected. Access the installer setup menu to initiate the system test. Follow the on-screen prompts or refer to the installation manual for specific instructions on navigating the test sequence. During the test, carefully observe the operation of each component. Ensure that the heating system produces warm air, the cooling system produces cool air, and the fan operates at the correct speed. If any issues are identified during the system test, double-check the wiring connections and system type settings. Correct any errors before proceeding. Some thermostats may offer specific tests for emergency heat or other specialized functions. Utilize these tests to confirm the proper operation of all aspects of your HVAC system. Successful completion of the Installer System Test ensures that your Honeywell FocusPRO TH6000 is properly configured and ready to provide reliable temperature control.
Wi-Fi Connectivity (If Applicable)
If your Honeywell FocusPRO TH6000 series thermostat includes Wi-Fi capabilities, connecting it to your home network enables remote control.
Connecting to Wi-Fi Network
To connect your Honeywell FocusPRO TH6000 series thermostat to your Wi-Fi network, start by ensuring your thermostat is a Wi-Fi enabled model; Consult your specific model’s installation manual for detailed instructions, as the process can vary slightly between models such as the TH6320WF. Typically, you’ll need to access the thermostat’s menu to find the Wi-Fi setup option. From there, the thermostat will search for available networks. Select your home Wi-Fi network from the list and enter your network password when prompted. Make sure you have your Wi-Fi password readily available. After entering the password, the thermostat will attempt to connect to your network. Once successfully connected, the thermostat will display a confirmation message and a Wi-Fi icon. You may also need to register your thermostat with Honeywell’s Total Connect Comfort app or website to enable remote access and control. This involves creating an account and adding your thermostat using its MAC address or registration code, which can usually be found on the thermostat itself or in the packaging. After registration, you can control your thermostat from anywhere using your smartphone or computer.
Troubleshooting Common Issues
This section addresses common problems encountered during or after the installation of your Honeywell FocusPRO TH6000 series thermostat.
Connection Failed Errors
Encountering a “Connection Failed” error on your Honeywell FocusPRO TH6000 series thermostat, particularly the Wi-Fi models, can be frustrating. This issue typically arises during the initial setup or after a disruption in your home network. Here’s a breakdown of potential causes and troubleshooting steps⁚
Wi-Fi Network Issues⁚
- Incorrect Password⁚ Double-check that you’ve entered the correct Wi-Fi password. Passwords are case-sensitive.
- Network Compatibility⁚ Ensure your router is compatible with the thermostat’s Wi-Fi standards (typically 2.4 GHz). Some thermostats don’t support 5 GHz networks.
- Signal Strength⁚ Verify that the thermostat has a strong Wi-Fi signal. If the signal is weak, consider moving the router closer or using a Wi-Fi extender.
- Router Reboot⁚ A simple router reboot can often resolve temporary network glitches.
Thermostat Issues⁚
- Incorrect Setup⁚ Review the Wi-Fi setup instructions in the installation manual to ensure you’ve followed each step correctly.
- Thermostat Reset⁚ Try resetting the thermostat to its factory defaults and then attempt the Wi-Fi setup again. Refer to the manual for reset instructions.
- Firmware Update⁚ Check if a firmware update is available for your thermostat. Outdated firmware can sometimes cause connectivity problems.
Account Issues⁚
- Honeywell Home App⁚ Make sure you have the latest version of the Honeywell Home app installed on your smartphone or tablet.
- Account Credentials⁚ Verify that your Honeywell Home account credentials (username and password) are correct.
Other Considerations⁚
- Firewall Settings⁚ Check your router’s firewall settings to ensure they are not blocking the thermostat’s access to the internet.
- Internet Service Provider (ISP)⁚ In rare cases, the issue may be with your ISP. Contact them to inquire about any outages or network problems.
If you’ve exhausted these troubleshooting steps and are still experiencing connection problems, consult the Honeywell support website or contact their customer service for further assistance. Provide them with the thermostat model number and a detailed description of the issue.