Keurig K-Mini Instructions⁚ A Comprehensive Guide
Unlock the full potential of your Keurig K-Mini with our comprehensive guide. From initial setup to troubleshooting‚ we provide step-by-step instructions to ensure a seamless brewing experience. Discover how to brew the perfect cup‚ maintain your K-Mini‚ and resolve common issues.

Overview of the Keurig K-Mini
The Keurig K-Mini coffee maker is designed for simplicity and convenience‚ offering a single-serve brewing solution for coffee lovers. Its compact design makes it ideal for small spaces‚ apartments‚ or anyone seeking a minimalist coffee setup. Despite its size‚ the K-Mini doesn’t compromise on functionality‚ providing a quick and easy way to enjoy a fresh cup of coffee. The K-Mini can brew cup sizes from 6 to 12 ounces depending on the model‚ using Keurig’s K-Cup pods. The manual operation allows for some control over the strength and flavor of your coffee by adjusting the amount of water used. Some models‚ like the K-Mini Plus‚ offer additional features such as a stronger brew option. This machine is compatible with Keurig’s K-Cup pods‚ offering various blends and flavors. It is straightforward and versatile‚ as well as compact and sleek. It requires a simple setup process. It’s perfect for beginners or anyone considering this compact and efficient coffee maker. The K-Mini is an affordable option if you don’t need all the bells and whistles. The K-Mini is effortlessly simple to use. It’s a real lifesaver for those with busy schedules. The K-Mini brewer is effortlessly simple to use‚ just add fresh water to the reservoir‚ pop in your favorite K-Cup pod‚ press the brew button. The K-Mini doesn’t compromise on functionality‚ providing a quick and easy way to enjoy a fresh cup of coffee.

Initial Setup and First Brew

Before brewing your first cup with the Keurig K-Mini‚ a few initial setup steps are essential. First‚ unpack the K-Mini and remove all packaging materials. Place the brewer on a flat‚ stable surface. Plug the power cord into a standard electrical outlet. Add desired amount of water into a mug (6oz minimum‚ 12oz maximum). Then‚ lift the water well lid. Pour the water from your mug into the well. Be sure that you don’t exceed the maximum fill line‚ which is typically indicated inside the reservoir. With the water reservoir filled‚ perform a cleansing brew to flush out any manufacturing residues. To do this‚ close the brewer handle without inserting a K-Cup pod. Place a mug on the drip tray to catch the water. Press the brew button to start the brewing cycle. The K-Mini will dispense hot water into the mug. Discard the water from the mug. Once the cleansing brew is complete‚ your Keurig K-Mini is ready for its first coffee. Lift the handle. Place a K-Cup pod in the K-Cup pod holder. Lower the handle completely. Make sure the K-Cup pod is properly seated in the holder. Place your mug on the drip tray and press the brew button to start the brewing process. The K-Mini will pierce the K-Cup pod and begin brewing coffee. Once brewing is complete‚ carefully remove the mug and enjoy your first cup. After brewing‚ lift the handle to eject the used K-Cup pod. The K-Mini is now ready for subsequent brews.
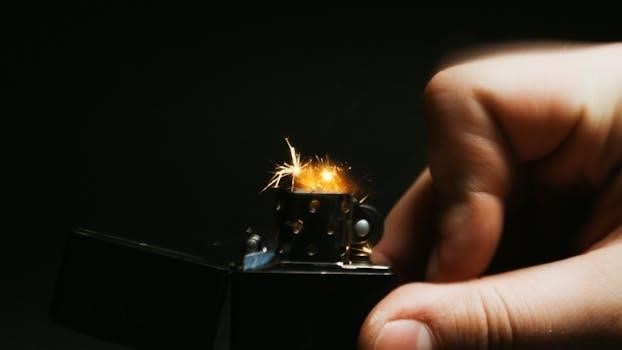
Brewing Process⁚ Step-by-Step Guide
The Keurig K-Mini offers a streamlined brewing process‚ perfect for quick and easy coffee preparation. Follow these steps to brew your favorite K-Cup beverage. First‚ ensure the K-Mini is plugged into a functioning electrical outlet. Lift the handle to open the brewer head. Select your desired K-Cup pod. Insert the K-Cup pod into the K-Cup pod holder‚ making sure it is properly seated. Lower the handle completely to pierce the K-Cup pod. The needle on the lid will puncture the K-Cup pod. Next‚ add fresh water to the reservoir. For a stronger brew‚ use less water; for a milder brew‚ use more. The K-Mini can brew cup sizes from 6 to 12 ounces. Place a mug on the drip tray to catch the brewed coffee. Press the brew button to initiate the brewing cycle. The K-Mini will heat the water and force it through the K-Cup pod‚ extracting the coffee. The brewing time typically takes under two minutes. Once the brewing cycle is complete‚ the K-Mini will automatically stop. Carefully remove the mug from the drip tray. The K-Mini does not have an automatic pod ejection feature. Lift the handle to manually remove the used K-Cup pod. Discard the used K-Cup pod responsibly. For the next brew‚ repeat these steps. If you want to control the strength and flavor of your coffee you can add more or less water. The K-Mini is now ready for its next brewing cycle.
Water Reservoir and Mug Size Selection
Understanding the water reservoir and mug size selection is crucial for optimal brewing with your Keurig K-Mini. Unlike larger Keurig models with a detachable water reservoir‚ the K-Mini features a single-cup reservoir. This means you must add fresh water each time you brew; To fill the reservoir‚ lift the water well lid located on top of the brewer. Using your desired mug‚ measure the amount of filtered water you want to brew. The K-Mini supports cup sizes ranging from 6 to 12 ounces. Ensure you add at least 6 ounces of water for the brewing cycle to function correctly. Pour the water from your mug into the water well‚ being careful not to overfill. Avoid using paper cups to measure the water. When selecting a mug‚ consider its size and material. The K-Mini is compatible with most standard mugs. The removable drip tray provides flexibility for accommodating taller mugs by simply detaching it from the base of the brewer. This allows you to use travel mugs or larger cups that would otherwise not fit. Always ensure the mug is properly positioned on the drip tray to prevent spills during the brewing process. Experiment with different water levels to find your preferred coffee strength. Remember‚ less water results in a stronger‚ more concentrated brew‚ while more water yields a milder flavor. Regular cleaning of the water well is recommended to maintain the quality of your coffee. By properly managing the water reservoir and mug size selection‚ you can consistently enjoy a perfectly brewed cup of coffee with your Keurig K-Mini.
K-Cup Pod Insertion and Operation
Proper K-Cup pod insertion is essential for the Keurig K-Mini to operate correctly and deliver a satisfying cup of coffee. Begin by lifting the handle on the top of the brewer to expose the K-Cup pod holder. Ensure that the pod holder is clean and free from any coffee grounds or debris from previous brews. Take your chosen K-Cup pod and carefully place it into the pod holder. It’s crucial to align the pod correctly within the holder to ensure the needles can properly pierce the foil lid and extract the coffee. Once the K-Cup pod is in place‚ gently lower the handle until it is completely closed and latched. You should feel a slight resistance as the needles puncture the top of the K-Cup pod. Avoid forcing the handle down‚ as this could damage the brewer or the pod holder. After closing the handle‚ ensure that your mug is properly positioned on the drip tray. The K-Mini is now ready to brew. Simply press the brew button located on the top of the machine to start the brewing process. The K-Mini operates with a single brew button‚ making it incredibly user-friendly. During the brewing cycle‚ the K-Mini will automatically draw water from the reservoir and heat it to the optimal brewing temperature. Once the brewing is complete‚ the machine will automatically shut off. After brewing‚ carefully lift the handle and remove the used K-Cup pod. Be cautious‚ as the pod may be hot. Dispose of the used pod responsibly. Regularly clean the K-Cup pod holder to prevent buildup and ensure optimal brewing performance. To remove the K-Cup pod holder for cleaning‚ lift the handle and grasp the top of the pod holder with one hand while pushing up on the bottom of the pod holder from underneath until it releases. After cleaning‚ align the K-Cup pod holder with the opening using the two front ribs as a guide. By following these steps for K-Cup pod insertion and operation‚ you can consistently enjoy a delicious and hassle-free coffee experience with your Keurig K-Mini;
Cleaning and Maintenance
Regular cleaning and maintenance are vital to prolong the life of your Keurig K-Mini and ensure optimal performance. A clean machine brews better coffee and prevents the buildup of mineral deposits and coffee oils that can affect taste and functionality. Start by unplugging the K-Mini and allowing it to cool down completely before cleaning. The exterior of the K-Mini can be wiped down with a damp‚ soft cloth. Avoid using abrasive cleaners or harsh chemicals‚ as these can damage the finish. The removable drip tray should be emptied and washed regularly with warm‚ soapy water. Rinse thoroughly and dry before replacing. The water reservoir‚ though small in the K-Mini‚ should also be cleaned periodically. Remove the reservoir and wash it with warm‚ soapy water. Rinse well to remove any soap residue. The K-Cup pod holder is another area that requires regular attention. To remove it‚ lift the handle and grasp the top of the pod holder while pushing up from underneath. Wash the pod holder with warm‚ soapy water‚ paying close attention to the needles that pierce the K-Cup pods. These needles can become clogged with coffee grounds‚ affecting the brewing process. Use a small brush or needle to gently clear any blockages. Rinse the pod holder thoroughly and allow it to air dry before reassembling; The funnel‚ if removable‚ should also be cleaned regularly. Wipe it down with a damp cloth or wash it with warm‚ soapy water. The entrance and exit needles‚ which puncture the K-Cup pods‚ are crucial components that require careful cleaning. Refer to the Keurig website for video instructions on cleaning these needles. Use a paper clip or a similar small tool to gently remove any coffee grounds or debris that may be clogging the needles. Descaling is another essential part of K-Mini maintenance. Mineral deposits can build up over time‚ affecting the machine’s performance and the taste of your coffee. Follow the descaling instructions provided in this guide to keep your K-Mini in top condition. By following these cleaning and maintenance steps‚ you can ensure that your Keurig K-Mini continues to brew delicious coffee for years to come.
Descaling Instructions
Descaling your Keurig K-Mini is a crucial maintenance step that removes mineral buildup from the internal components‚ ensuring optimal performance and extending the lifespan of your coffee maker. Mineral deposits‚ primarily calcium and lime‚ accumulate over time due to the minerals present in water. These deposits can clog the machine‚ reduce brewing speed‚ and affect the taste of your coffee. Descaling should be performed every 3-6 months‚ depending on the hardness of your water. To begin the descaling process‚ you will need a bottle of Keurig Descaling Solution or a mixture of white vinegar and water. If using Keurig Descaling Solution‚ follow the instructions on the bottle. If using white vinegar‚ mix equal parts white vinegar and water. Ensure there is no K-Cup pod in the holder. Remove and clean the water reservoir. Pour the descaling solution or vinegar mixture into the empty water reservoir. Place a large ceramic mug on the drip tray to catch the descaling solution. Do not use a paper cup. Turn on your Keurig K-Mini. Lift and lower the handle without inserting a K-Cup pod. Press the brew button to start the descaling process. Allow the machine to brew until the water reservoir is empty. This process may take several brew cycles. Once the reservoir is empty‚ refill it with fresh‚ clean water. Repeat the brewing process several times to rinse the machine thoroughly. This will remove any remaining descaling solution or vinegar residue. Continue brewing with fresh water until the water runs clear and there is no lingering odor of vinegar. After rinsing‚ remove and clean the drip tray and water reservoir. Reassemble the K-Mini. Your Keurig K-Mini is now descaled and ready to brew delicious coffee. Regular descaling will prevent mineral buildup and ensure that your K-Mini continues to function properly. Remember to descale every 3-6 months‚ or more frequently if you notice a decrease in brewing speed or a change in the taste of your coffee. By following these descaling instructions‚ you can maintain the performance and longevity of your Keurig K-Mini.

Troubleshooting Common Issues
Even with proper care‚ you might encounter some common issues while using your Keurig K-Mini. This section provides troubleshooting steps to help you resolve these problems and get your coffee maker back in working order. One common issue is the K-Mini not brewing. If your K-Mini is not brewing‚ first ensure that it is properly plugged into a working outlet and that the power button is turned on. Check that there is enough water in the reservoir and that the water reservoir is properly seated. Also‚ make sure that the handle is fully closed and that a K-Cup pod is properly inserted into the pod holder. If the K-Mini still does not brew‚ try descaling it‚ as mineral buildup can prevent proper operation. Another issue is weak or watery coffee. This can be due to using too much water for the K-Cup pod. Ensure that you are using the correct amount of water for the pod size. You can also try using a stronger K-Cup pod blend or selecting a smaller cup size. If the coffee maker is brewing slowly‚ this could be a sign of mineral buildup. Descaling the machine should resolve this issue. A clogged exit needle can also cause slow brewing or no brewing at all; To clean the exit needle‚ carefully use a paperclip or a needle cleaning tool to remove any coffee grounds or debris. If the K-Cup pod holder is difficult to remove‚ lift the handle and grasp the top of the pod holder while pushing up from underneath until it releases. Ensure that the pod holder is properly aligned with the opening when reinserting it. If you accidentally plugged your Keurig K-Mini into a 220V outlet‚ it may cause damage to the internal components. In this case‚ you may need to replace the damaged parts or contact Keurig customer support for assistance. If you experience any other issues‚ consult the Keurig K-Mini user manual for further troubleshooting steps or contact Keurig customer support for assistance. By following these troubleshooting tips‚ you can resolve common issues and keep your Keurig K-Mini running smoothly.