This guide provides comprehensive door closer fitting instructions, ensuring proper installation and optimal performance. Following these steps will help achieve smooth, controlled door operation. This includes understanding types and adjustments.
Understanding Door Closer Types
Before initiating any door closer fitting instructions, understanding the variety of door closer types is critical. Surface-mounted closers are common and easily installed, attaching directly to the door and frame. Concealed closers, offering a more aesthetic appeal, are hidden within the door or frame, requiring more intricate installation.
Overhead closers, a subtype of surface-mounted options, are suitable for high-traffic areas, providing robust performance. Furthermore, there are specialized closers for specific applications, such as fire-rated doors, which demand strict adherence to safety standards. Selecting the appropriate door closer type depends on the door’s weight, frequency of use, and desired aesthetic, influencing the subsequent fitting instructions.
Choosing the Right Door Closer
Selecting the correct door closer is crucial before commencing any door closer fitting instructions. Consider the door’s size and weight, as heavier doors require stronger closers. The frequency of door use also plays a significant role; high-traffic areas necessitate more durable models. Evaluate the environment where the door closer will be installed; external doors may need weather-resistant options.
Fire-rated doors mandate specific closers compliant with safety regulations. Furthermore, assess the desired closing speed and adjustability features. Some closers offer adjustable closing and latching speeds, enhancing user convenience. Matching the door closer‘s aesthetics to the door and surrounding environment is also a factor to consider during the selection process, ensuring a cohesive design.
Tools Required for Installation
Before initiating any door closer fitting instructions, gathering the necessary tools is essential for a smooth and efficient installation. A power drill with various drill bits is crucial for creating pilot holes and securing screws. A screwdriver set, including both Phillips head and flathead screwdrivers, will be needed to tighten fasteners.
A measuring tape ensures accurate placement and alignment, while a level guarantees the door closer is installed straight. A pencil is useful for marking drilling locations. Safety glasses are vital to protect your eyes from debris. Depending on the door closer model, you might need pliers or wrenches. Finally, having a ladder or step stool can aid in reaching higher areas of the door and frame, ensuring safe and comfortable installation.

Preparing for Installation
Before starting, carefully review all door closer fitting instructions. This includes understanding the door’s swing, handing, and marking the door and frame accurately. A template ensures precise placement during installation.
Determining Door Swing and Handing
Accurately determining the door’s swing and handing is crucial for successful door closer fitting instructions. This ensures the closer is installed on the correct side and operates effectively. First, observe which way the door swings⁚ is it left-handed or right-handed?
Stand facing the door. If the hinges are on your left, it’s a left-handed door. If the hinges are on your right, it’s a right-handed door. Next, determine if it’s an “inswing” or “outswing” door. An inswing door opens inward, while an outswing door opens outward.
This combination defines the door’s specific handing (e.g., left-hand inswing). Understanding this prevents installation errors. Consult the door closer’s manual for diagrams illustrating various door handings. Incorrect handing selection may cause operational failure, reducing efficiency. Verify the handing before proceeding.
Marking the Door and Frame
Precise marking of the door and frame is vital for accurate door closer fitting instructions and installation. Begin by holding the door closer template (if provided) against the door and frame, aligning it according to the determined door handing.
Using a pencil or marker, carefully mark the screw hole locations through the template onto both the door and the frame. Ensure these marks are clear and visible for drilling. If a template isn’t available, measure and mark the appropriate distances based on the door closer’s specifications, consulting the door closer fitting instructions.
Double-check all measurements before drilling to avoid errors. Misaligned holes can compromise the closer’s stability and function. For metal doors or frames, use a center punch to create a starting point for the drill bit, preventing it from wandering. Accuracy is key!
Using a Template (If Provided)
A template is an invaluable aid when following door closer fitting instructions, ensuring accurate hole placement and alignment. If your door closer kit includes one, carefully remove it and unfold it completely. Identify the correct template section for your specific door closer model and mounting configuration.
Position the template against the door and frame, aligning it with the marks you made earlier based on the door swing and handing. Secure the template firmly using tape strips, ensuring it doesn’t shift during the marking process. Using a sharp awl or pencil, carefully mark the center of each hole indicated on the template onto the door and frame.
Double-check that all markings are clear and accurate before removing the template. The template ensures that the door closer fitting instructions are implemented precisely, leading to a successful and efficient installation.

Installation Steps
This section details the core installation steps for your door closer. Secure the body, attach the arm shoe, and finally, connect the arm. Precision is key for proper function.
Mounting the Door Closer Body
Mounting the door closer body is a crucial step in the installation process. Begin by carefully positioning the body on the door or frame, depending on your chosen configuration and the manufacturer’s instructions. Ensure the correct orientation, typically with the speed adjusting valve towards the hinge edge. Use the provided screws to secure the body firmly.
Accurately align the body with the markings made during the preparation stage. Double-check that the screw holes align perfectly before fastening. Tighten the screws evenly to prevent warping or misalignment. The stability of the mounted body directly impacts the overall functionality and lifespan of the door closer. If a template is provided, use it to ensure precise screw placement.
For heavier doors, consider using longer screws for increased security. Verify that the body is flush against the door or frame surface, preventing any gaps or wobbling. A properly mounted body is essential for smooth, reliable door closing operation.
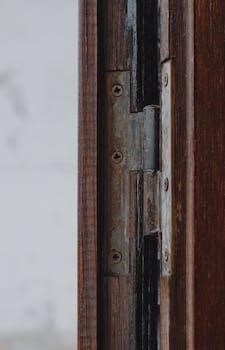
Attaching the Arm Shoe
Attaching the arm shoe involves securing it to the door frame, opposite the door closer body. The placement is critical for proper arm alignment and function. Use the provided screws, ensuring they are appropriately sized for the frame material. Pilot holes may be necessary to prevent splitting the wood. Align the arm shoe precisely with the markings made earlier, ensuring it’s perpendicular to the door.
Tighten the screws firmly, but avoid over-tightening which can strip the threads or damage the frame. The arm shoe needs to be rigidly fixed to withstand repeated stress from the door’s opening and closing. If the frame material is weak, consider using reinforcement plates for added stability. The correct attachment of the arm shoe is vital for the door closer’s smooth and efficient operation.
Verify that the arm shoe is level and securely fastened before proceeding to the next step. A misaligned or loosely attached arm shoe can cause binding, premature wear, and eventual failure of the door closer mechanism.
Connecting the Arm
Connecting the arm involves linking the door closer body to the arm shoe. Position the arm segments to align correctly. One arm segment attaches to the closer’s pinion shaft, usually with a screw. Ensure this connection is tight. The other segment connects to the arm shoe, often using a similar screw or bolt. Some arms are adjustable, allowing fine-tuning of the door’s closing arc.
When connecting, make sure the arm is not obstructed and moves freely. Check the manufacturer’s instructions for the correct arm configuration. A poorly connected arm can cause the door to bind or slam. Secure all screws and bolts tightly. After connecting, manually swing the door to test the arm’s movement.
Adjust the arm’s length if necessary, ensuring the door closes fully and latches securely. A properly connected arm guarantees smooth and reliable door closing. Recheck all connections after initial use.
Adjustments and Final Checks
Adjustments and final checks are crucial for optimal door closer performance. Fine-tune closing and latching speeds for smooth operation. Inspect all connections, ensuring the door closes fully and latches securely. Troubleshoot any issues.
Adjusting Closing and Latching Speed
Properly adjusting closing and latching speed is essential for door closer functionality. Locate the adjustment valves, typically found on the door closer body. The closing speed valve controls how quickly the door swings from its open position to a few inches from the frame. Use a small screwdriver to make incremental adjustments, turning clockwise to slow down the speed and counter-clockwise to increase it. Aim for a smooth, controlled closing motion that prevents the door from slamming shut.
The latching speed valve regulates the final few inches of the door’s travel as it engages with the latch. Adjust this valve to ensure the door closes completely and latches securely without excessive force. A properly adjusted latching speed prevents the door from bouncing back open or requiring excessive effort to close. After each adjustment, test the door’s operation to ensure the desired speed is achieved. Remember⁚ incremental changes are key to achieving optimal performance.
Ensuring Smooth Operation
Ensuring smooth operation of a door closer involves several key checks and adjustments after installation. First, observe the entire range of the door’s motion, from fully open to completely closed. The door should move freely without any binding or sticking points. If you encounter resistance, inspect the arm connections and mounting hardware for proper alignment and tightness.
Next, pay close attention to the consistency of the closing speed throughout the door’s arc. There shouldn’t be any abrupt changes in speed or jerky movements. If inconsistencies are present, fine-tune the closing and latching speed adjustments as needed; Lubricate all moving parts, such as the arm hinges and the closer body’s piston, with a light oil or silicone-based lubricant. This will minimize friction and promote smoother, quieter operation. Finally, double-check that all screws and fasteners are securely tightened to prevent loosening over time. With these steps, you can maintain optimal door closer performance.
Troubleshooting Common Issues
Troubleshooting common issues with door closers often involves identifying and addressing specific symptoms. If the door slams shut, the closing speed may be set too high. Reduce the closing speed by adjusting the appropriate valve. Conversely, if the door fails to latch completely, increase the latching speed. If the door is difficult to open, it could be due to excessive backcheck. Adjust the backcheck valve to reduce the resistance during the opening phase.
Squeaking or grinding noises usually indicate a lack of lubrication. Apply a lubricant to all moving parts. If the closer arm binds or sticks, check for obstructions or misalignments. Ensure the arm is properly connected and aligned with the door and frame. If problems persist, consult the manufacturer’s manual or a qualified technician.